
Tutorial 5: Texturing 연습문제
To Do Exercises
1. Re-compile the code and ensure that a texture mapped triangle does appear on your screen. Press escape to quit once done.
2. Create your own dds texture and place it in the same directory with seafloor.dds. Inside the GraphicsClass::Initialize function change the model initialization to have your texture name and then re-compile and run the program.
3. Change the code to create two triangles that form a square. Map the entire texture to this square so that the entire texture shows up correctly on the screen.
4. Move the camera to different distances to see the effect of the MIN_MAG_MIP_LINEAR filter.
5. Try some of the other filters and move the camera to different distances to see the different results.
1. 코드를 다시 컴파일하고 실제로 화면에 텍스쳐가 입혀진 삼각형이 나오는지 확인해 보십시오. 잘 보인다면 Esc키를 눌러 나오십시오.

2. 여러분만의 dds 텍스쳐를 만들고 seafloor.dds 파일이 있는 폴더에 저장하십시오. GraphicsClass::Initialize 함수에서 모델 초기화를 여러분의 텍스쳐로 하도록 바꾸고 다시 컴파일하여 실행해 보십시오.
graphicsclass.cpp
bool GraphicsClass::Initialize(int screenWidth, int screenHeight, HWND hwnd)
{
..........................생략..............................
    // Initialize the model object.
    result = m_Model->Initialize(m_D3D->GetDevice(), L"../rastertek/data/coda.dds");
..........................생략..............................
}
3. 코드를 수정하여 두 개의 삼각형이 사각형을 이루도록 바꾸어 보십시오. 사각형에 전체 텍스쳐를 입혀서 화면에 텍스쳐의 모든 부분이 제대로 보이도록 해 보십시오.
bool ModelClass::InitializeBuffers(ID3D11Device* device)
{
..............................생략..............................
	// Set the number of vertices in the vertex array.
	m_vertexCount = 4;

	// Set the number of indices in the index array.
	m_indexCount = 6;
..............................생략..............................
	vertices[0].position = D3DXVECTOR3(-1.0f, -1.0f, 0.0f);  // Bottom left.
	vertices[0].texture = D3DXVECTOR2(0.0f, 1.0f);

	vertices[1].position = D3DXVECTOR3(-1.0f, 1.0f, 0.0f);  // Top left.
	vertices[1].texture = D3DXVECTOR2(0.0f, 0.0f);

	vertices[2].position = D3DXVECTOR3(1.0f, -1.0f, 0.0f);  // Bottom right.
	vertices[2].texture = D3DXVECTOR2(1.0f, 1.0f);

	vertices[3].position = D3DXVECTOR3(1.0f, 1.0f, 0.0f);  // Top right.
	vertices[3].texture = D3DXVECTOR2(1.0f, 0.0f);

	// Load the index array with data.
	indices[0] = 0;  // Bottom left.
	indices[1] = 1;  // Top middle.
	indices[2] = 2;  // Bottom right.

	indices[3] = 2;  // Bottom left.
	indices[4] = 1;  // Top middle.
	indices[5] = 3;  // Bottom right.
..............................생략..............................
}
4. MIN_MAG_MIP_LINEAR 필터의 효과를 보기 위해 다른 거리가 되도록 카메라를 이동시켜 보십시오.
참고로 coda.dss파일에서 seafloor.dds 파일로 다시 전환했음.
5. 다른 필터를 시도해 보고 카메라를 옮겨 다른 결과가 나오는지 확인해 보십시오.
textureshaderclass.cpp
bool TextureShaderClass::InitializeShader(ID3D11Device* device, HWND hwnd,
	WCHAR* vsFilename, WCHAR* psFilename)
{
...................생략...................
	// 4번에서는 samplerDesc.Filter = D3D11_FILTER_MIN_MAG_MIP_LINEAR;를 사용
	samplerDesc.Filter = D3D11_FILTER_MIN_MAG_MIP_POINT;
...................생략...................
}
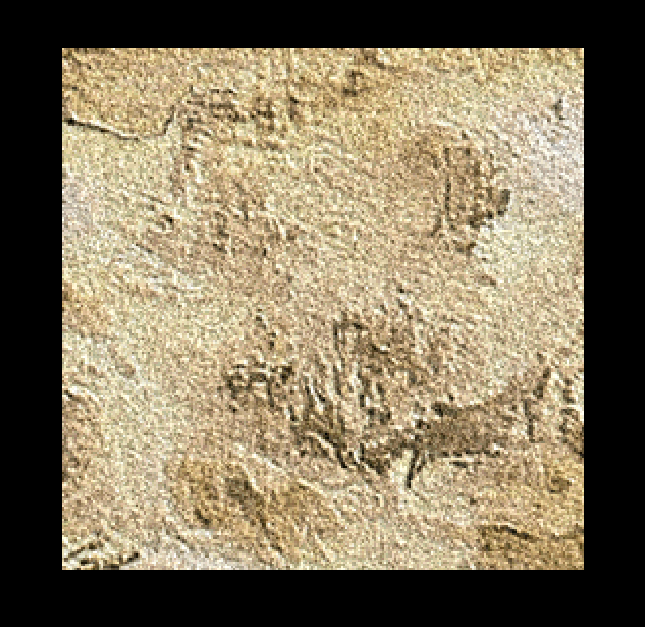
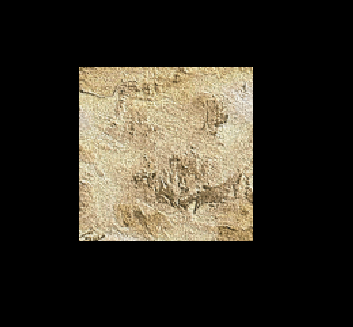
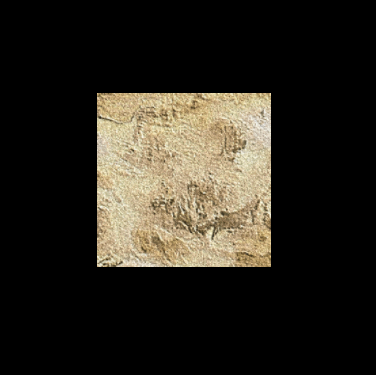
자세히 보면 POINT를 사용한 그림이 더 거칠고 LINEAR를 사용한 그림이 더 부드럽게 보인다.